

How do you like the rock sliders? I'm thinking of making some and yours look pretty straight forward. Is the other bracket part bolt under the chassis?
Sent from my iPhone using Tapatalk


How do you like the rock sliders? I'm thinking of making some and yours look pretty straight forward. Is the other bracket part bolt under the chassis?
Sent from my iPhone using Tapatalk
They are reasonably light duty, I wouldn't want to land heavily on them, but for general bumps and grinds they are perfectly fine. They just butt up against the chassis and there's another plate that goes on the inside of the chassis then just bolted through above and below the chassis. You can see the 4 other plates leaning against each other in the photo. They seem to do the job effectively.
These arrived today, and I'm glad to see them. Means I can put my TJ back together again and get it on the road, just in time too as I have a few trips set up for the next couple of weeks.
Can't thank Brett in Jeep City Canberra enough for getting these bits out of the states and to me in record time, fantastic customer service :-)
Bit of maintenance today, replaced a squeaky belt tensioner. Could only get a 2nd hand one at short notice. Looks like it's more worn out than the one it replaces, but it came with 12 months warranty and very easy to replace, so I'll see how it goes.
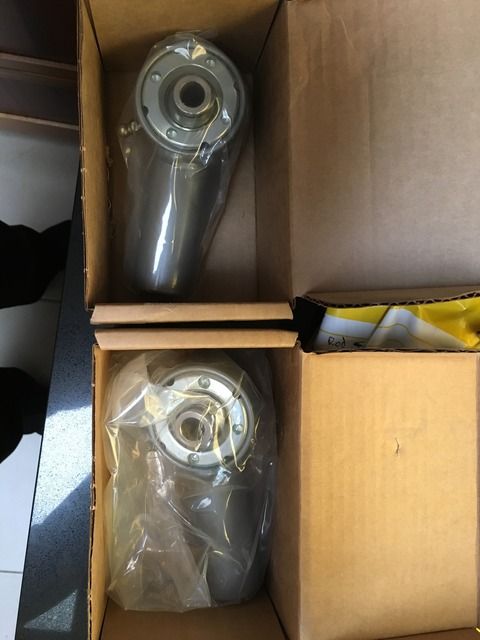
Then my attention turned to the front wheel bearing. These things turned up today, so no time like the present to throw them in.
Very easy and straight forward job to do. I did find the capillar very stiff to push back, I did remember seeing YouTube videos of people useing g clamps etc to push them back, so with this in mind I did find that an 18mm Kinchrome socket is the perfect spacer and made reinstalling the calliper very straight forward and quick.
Please excuse the lack of pads, this apparently is my next job.
Finished product.
Here's a short video of the bearing that came out of it
https://youtu.be/7XXadfm0ZbU
Bit of a cosmetic update this afternoon for my little TJ.
Old lights off and clean up the area behind them, take note of what colour wire does what. Line up your hole saw so as to cut out all the other holes.
Take a deep breath, grab a fresh battery for the drill and rip in. No going back now.
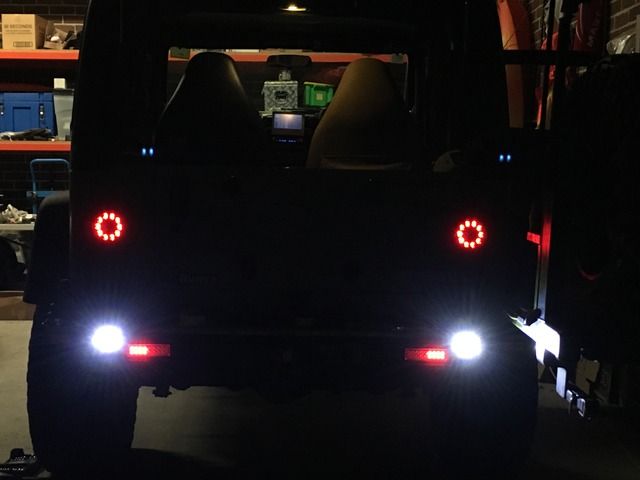
Wire them up and pop them in. If you look closely on the rear bar you'll see the two little Eagle Eye reverse lights on each side.
Off eBay, about $2 each
Nice. I wanted to fit tail lights like yours but I don't have the balls to cut two big holes into the tub lol. It was hard enough drilling four small holes when I fitted the Garvin expedition rack to it lol
#366. TJ Wrangler Golden Eagle
Haha I get what you mean, just take a deep breath and go.
Latest update to my TJ is a Poison Spyder louvered hood to get a bit of under bonnet heat out and away from everything.
First up take the bonnet off, put on the template on, which was the best quality template I've seen on anything to date. Mark it out and start cutting some sizeable holes through the bonnet.
Paint up the bare metal edges and screw the louvers on. Fitted like a glove and looks pretty smart in my opinion.
It's designed to not cut any of the structural bonnet supports, which is good, one less thing to worry about with the boys.
Now just to get used to the new view.
PS: For those wondering about water getting onto the engine when it rains, my TJ sat out the front for 2 days without the bonnet on including sitting through that big storm we just had, no problems, just turn the key and it started right up.
These turned up today
To replace the one I broke last weekend doing this

After this my TJ spent a while at the fabricators getting a few odd jobs done, namely. Welding up my cracked pan hard bracket on the front drivers side chassis, then bracing it across to the opposite chassis rail. Next the drivers side front upper arm diff mount was sleeved to stop the bush floating around. Finally relocated my spare to the centre by extending the swing arm on my rear bar.
While my Jeep was away I started tinkering on eBay which is never a good idea, next thing you know this stuff starts turning up.
And a STEDI 50" 4K light bar
After painting up all the fabrication work, rewiring my rear bar and installing a new RFI UHF antenna (my UHF actually works now) I stared working on the wiring in the cab. This began with removing the dash and finding huge amounts of redundant wiring.
After fixing this up and modifying dash panels to house switches I started the light install. This starts with removing the 8 windscreen torx bolts. Using heat, 7 of the 8 came out no problems, but one pesky bugger gave me grief, eventually I drilled it out and used an Ezyout.
While I was at it I ran power to the back for a car fridge and installed a camp light on the inside edge of the rear window. Also installed some rock lights under it. They are a good start but need more yet. Lifted the cowl panel and ran some wires, installed the light bar brackets, pod lights and light bar. This is the finished product.
Took it for a spin and it lit up the world, but as expected whistled like a bastard. Having prepared for this I installed a couple of lengths of rubber edge protection from Bunnings, took it for another spin and you wouldn't even know it was up there. Super happy with the result.
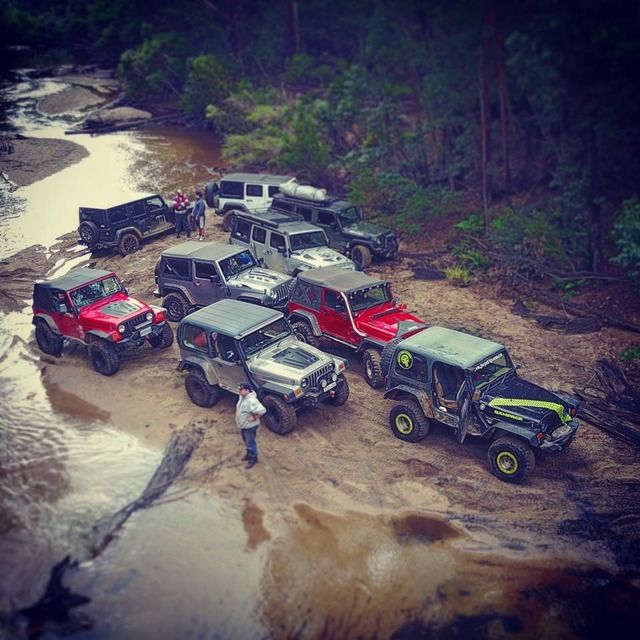
All this was completed just in time to take it down the coast and get it dirty with a bunch of other cool Jeeps.
 Posting Permissions


Bookmarks